
 a 'snow' banner that is currently for sale in the shop...
i know, i know...i'm sooo late on this, i'm sure. i can hear all you seasoned crafters and shopkeepers out there shaking your head and laughing at me right now. you're thinking, 'silly girl, you're a whole season behind if you're just starting your christmas crafts...'
and you're right. i am. and in defense i will say that i just began my shopkeep adventures, and hopefully, by next christmas, i will be on target with the rest of you.
but for now, i remain a happy crafter that doesn't know any better...except i do know better when it comes to crafty experiments in the kitchen. and lucky for you, i'm going to share my latest crafting experiment, and save you some money on at least a small portion of your seasonal decorating and crafting this year.
if you love vintage like me, then you probably love the look of old white bottlebrush trees dusted with glass glitter or mica when it comes to christmas decorating. and, if you're like me again, you hate paying ridiculously for the reproductions. and these little guys are pretty hard to come by in antique stores...at least the decent looking ones. so, i got to thinking, why not make my own?
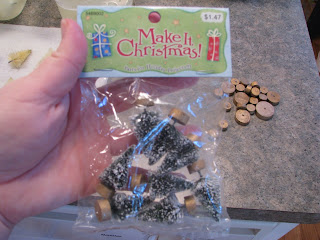
i have discovered that with a package of store bought green bottle brush trees from Michael's and a little bleach, you too can have a frosty, white forest of trees all over the place this christmas season.
here's how...
you will need:
a package of cheap bottle brush trees
a bottle of bleach
two plastic containers or bowls for soaking

the first thing you want to do is pull off the wooden base on each tree, and toss that on the side. keep it, because you'll want these guys to stand again -- unless you are going to craft some new bases. pour some bleach, full strength, into one of your containers, and submerge your trees. you don't want to put too many in. give them room to soak. now, WATCH THEM! the bleaching process will happen almost in front of your eyes. let them soak until they are nearly white; i find that this takes approximately 5-7 minutes. then rinse them under water, using your fingers to gently massage the bottlebrush fibers, rinsing away any green dye that may remain. next, you will want to create a second bleach bath in your other plastic container. this second bath is simply to remove any remaining green tint to the bottlebrush. submerge your bleached trees in the second bleach bath, letting them sit for another 5-7 minutes. it is very important to watch your trees! leaving them in the bleach for too long will cause the bristles of the bottlebrush to disintegrate and fall out. you'll want to rinse them well again, under running water, being careful to fluff the bristles on each tree. if they do not fluff, and they just lay flat, it means you have left them in the bath too long.


when you have finished rinsing, just lay them on a few layers of paper towel to dry. once they are dry, you can put the little wooden base back on them, and embellish with mica or glass glitter or little vintage mercury glass beads. go nuts, because it really only cost you a few bucks!
so how do you like that? vintage for less...
happy crafting people!
ps. if you're crafting anything interesting right now, and you would like to share, please send some pics! share them on the blog!
That is AWESOME~ Thanks for sharing!
ReplyDeleteHello~ stopping by after checking out your etsy store.. I really enjoyed all your items! Keep up the lovely work.
ReplyDelete-MrsH
thank you! i'm flattered and always heartened by the warm feedback...
ReplyDeleteI love this idea... I saw it on another blog somewhere out in blogland... but I have not tried it yet! I wondered if you could re-dye them pink or some other pastel color... think I will give it a shot!
ReplyDeleteTania